Chapter 2 Getting started with RStudio
2.1 Use RStudio as a calculator
- Go the console (usually LHS at the bottom, where you see the cursor
>).
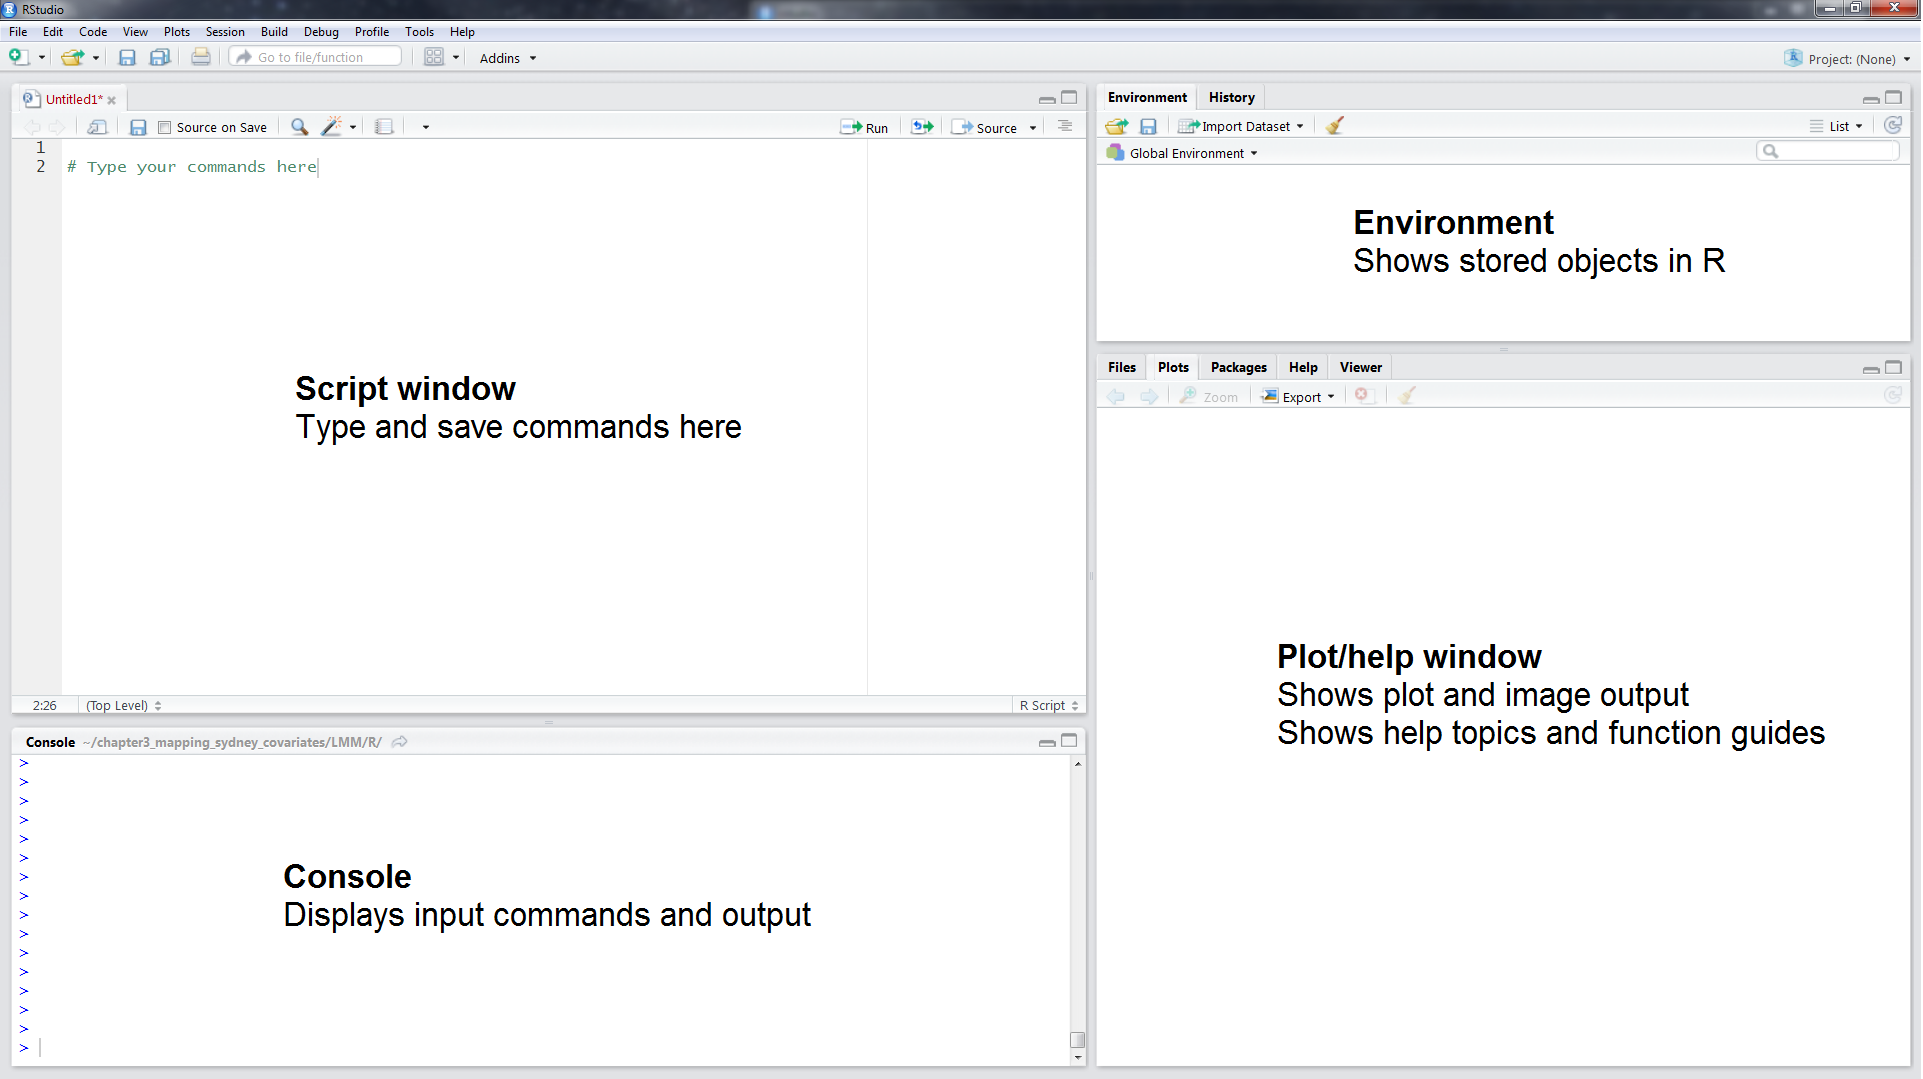
- Copy the following commands into the bottom Console. After each command, press the Enter/Return key on your keyboard.
- Alternatively, you can copy the commands into the top Script Window. Highlight all the commands, and press
Runfunction. Note that the output is in the bottom Console.
2.2 Experiment with data in R
Many data sets are already loaded into R. They are good to experiment with, and are used in the R/LQuizzes.
- For a list of all data available, type
data().
- For example, we’re going to consider
mtcars. To view the data, simple type its name.

- Clearly this is not recommended for large data sets! Instead, look at the first or last rows using the
headortailfunctions.
- You can find out about the data by using
help().
- Or, read about the mtcars data set.
2.3 Get organised: course folder
It’s very important to set up a neat file management system for the semester. This is best practise, and will make your life easier!
- Create a course folder on your Desktop. eg
DATA1001files.
2.4 Knit a given RMarkdown file
RMarkdown is a clever document/file which can save all your Rcode and comments in one place for easy editing.
You have been given the file
Lab1.Rmdon your Labs page on Canvas.Download the file
Lab1.Rmd, and store it in your new course folderDATA1001files.
- Double-click on the file and notice how it automatically opens in the top LHS window of RStudio.
The information at the top is called the YAML, which you can edit it: eg in
author: "xxx", replace your name forxxx.)Render the file using
Knit.
- This will create
Lab1.html, which you can open in a browser. This becomes your final report.
You can create new RMarkdown files by duplicating
Lab1.Rmdand renaming itProject1.Rmdetc.To customise your RMarkdown file, see RMarkdown Cheat Sheet
2.5 Neat workflow
- There is a handy way to streamline your workflow, so that the output of the
.Rmdopens next to your input in the RStudio console. This makes it very easy to edit and see your results.
- Open preferences
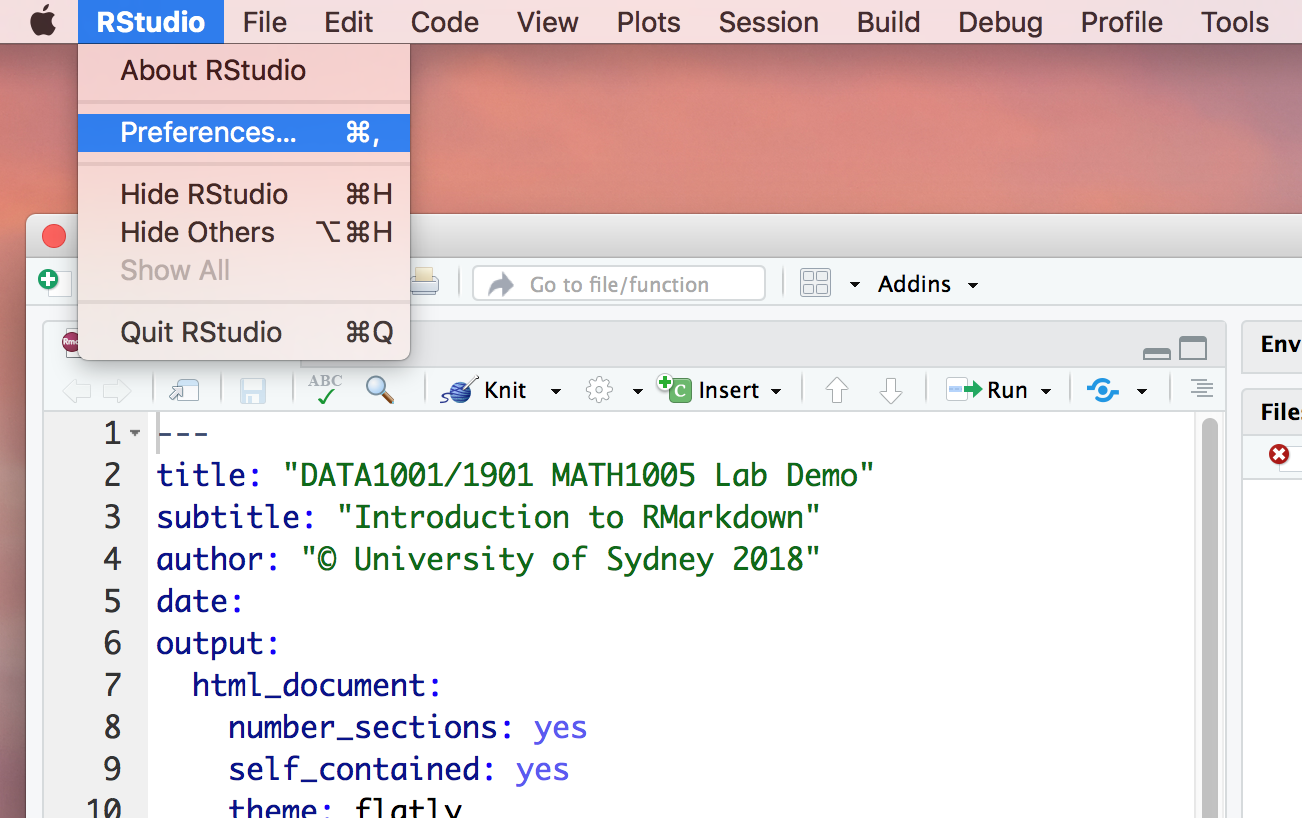
Select R Markdown
Select ‘Viewer Pane’
Click ‘Apply’
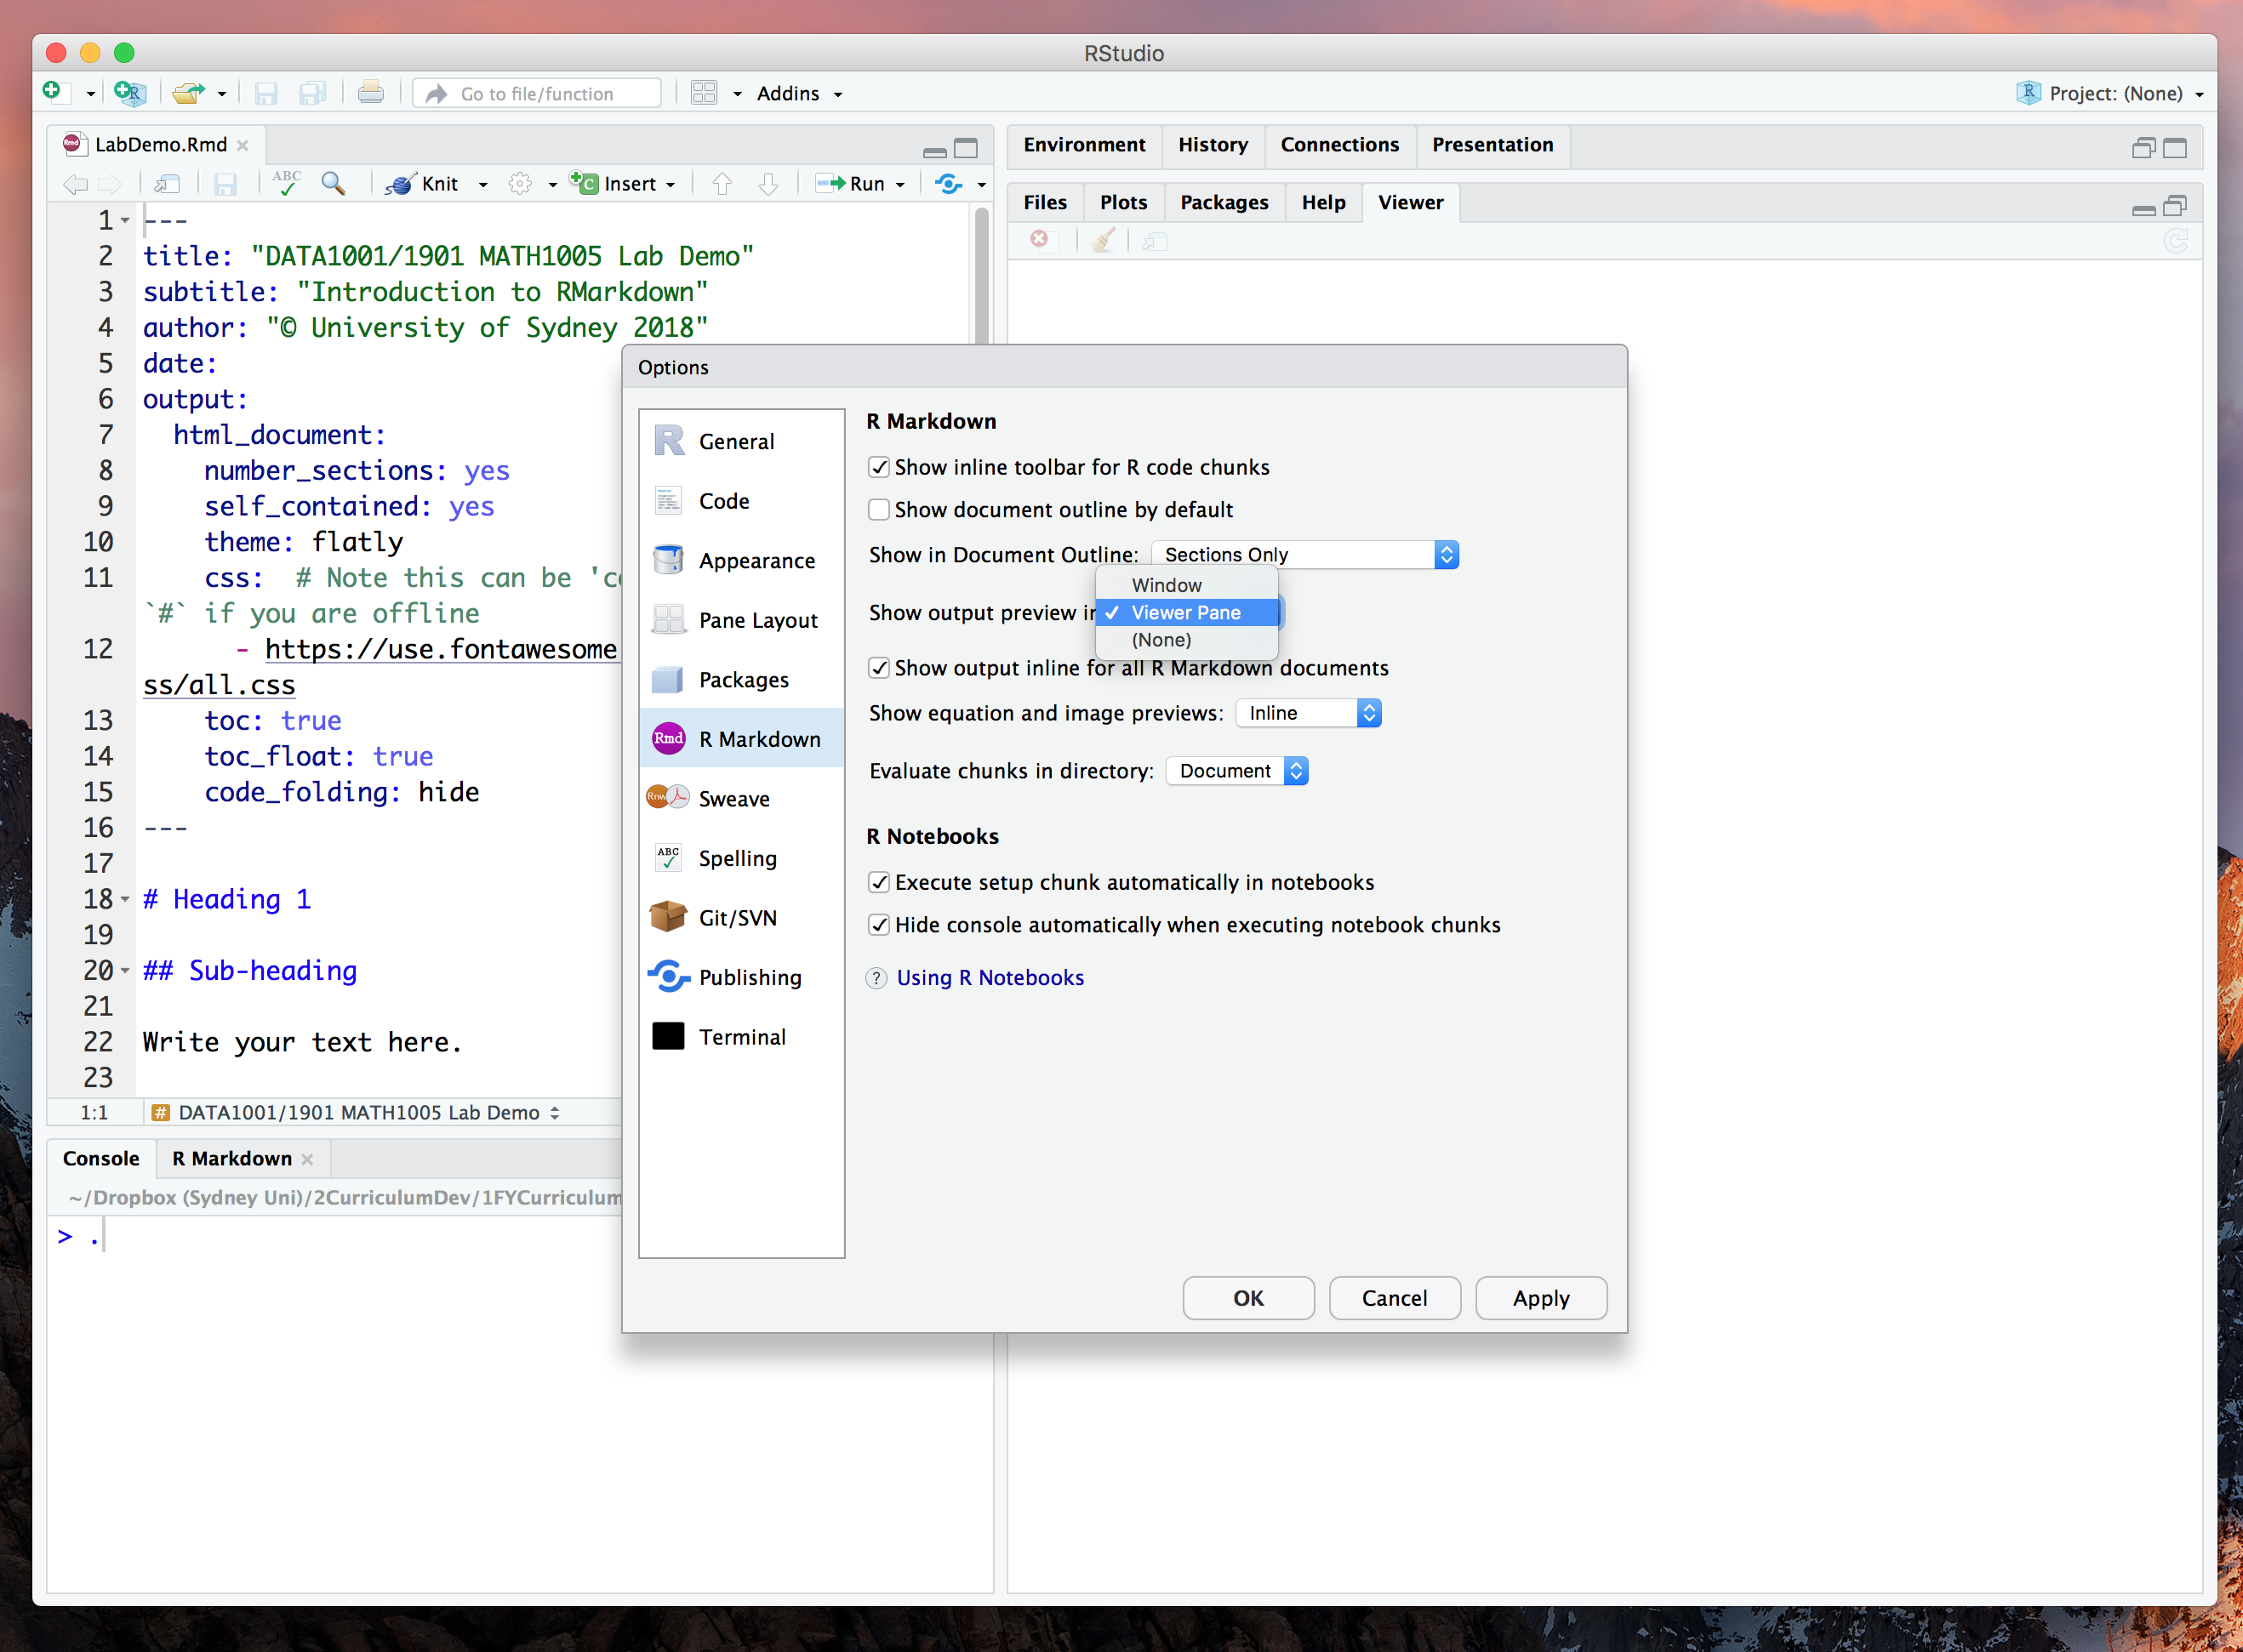
- Now knit your
LabDemo.Rmd'file and see what happens - neat!

- This will remain the setup for next time you open RStudio.
2.6 Install packages
What to do if a package is missing?
- Suppose you try and knit your .Rmd, only to face the error below:
Error in library(somepackage) : there is no package called âsomepackageâ
(Note, of course, somepackage is being used as a place holder here! Replace with the name of the actual package that is missing).
No need to fret! All we need to do is install the package
somepackagefrom CRAN, which is a repository for R packages.What is an R package? Good question. You can think of an R package like an app on the app store : it contains sets of functions that allow R to have extra functionality. For example, R was at the beginning, designed to be used very much like a calculator (very basic!). To be able to
knitreports, we need new packages to enable R to extend its capabilities beyond the most basic packages downloaded with R.

CRAN is very much like the App store - but for R!
So how do we access CRAN? Right through the command line!
In the console in R, you simply need to type
install.packages("somepackage")
- And R automatically searches and downloads for that package on CRAN. You can then try knitting your report again! Sometimes, more than one package will be missing - if this is the case - just repeat the steps above until they are all installed.
In summary:
- If want to use a certain package, use the following code. This is a 1 off step. It will now appear in the list of packages in the bottom LHS window.
- Then every time, you start a new .Rmd document, or session in R, you need to call up the package by using
library.